All about Root a Tablet
What Is Rooting?
First, for the newbies, let me clarify what rooting is. Getting root or rooting your phone is the process of modifying the operating system that shipped with your device to grant you complete control over it.
This means you can overcome limitations that the carriers and
manufacturers put on your phone, extend system functionality, and even
upgrade it to a custom flavor of Android.
The name root comes from the Linux operating system world,
where the most privileged user on the system (otherwise known as
Administrator on Windows) is called root.
Benefits Of Rooting
Let’s check out some of the benefits of rooting your Android phone.
Full Control Over Android
You have access to alter any system files, use themes, change boot images, delete annoying stock apps, such as Sprint's
NFL Mobile live and Nascar Sprint Cup Mobile, and other various native
applications that might drive you crazy (Footprints, Voice Dialer, etc).
There is plenty of information on the web on how to accomplish this, but our favorite way is by using Titanium Backup and freezing/deleting the apps from there (root required, of course).
Back Up And Restore The Whole System
On most rooted Android devices, you can back up your entire system to an SD card, much in the same way you can image a hard drive.
This is great if you’d like to try a new ROM, as you can back up your
phone, wipe it completely, flash the new ROM, and if you don’t like it,
just restore from your backup to get your device back to exactly how it
was before you wiped it.
The easiest way to do this at the moment is by using ROM Manager, developed by famed Android developer Koush.
ROM Manager allows you to easily flash a custom recovery image which
is what you will need in order to backup and restore your phone. The
recovery image is a special program that can be booted into outside of
the phone's main operating system, sort of like an OS recovery console
on a PC. By default, the recovery image on most Android phones only
gives you a few options, mainly related to wiping the phone. Custom
recovery images expand upon these options and usually include scripts
that can do things like backup and restore your system, fix file
permissions, or allow you to flash custom ROMs that the normal recovery
image would otherwise reject.
Normally, flashing a custom recovery image requires some command line
work, either on your PC, or on a terminal emulator directly on the
phone, but Koush's ROM Manager should automatically flash his custom
recovery image (known as ClockworkMod Recovery) for you, provided you're
on one of the supported phones (<-- the list in this link should be always up-to-date, as it's maintained by Koush) and that it is already rooted.
Using ROM Manager is pretty simple. Download and install the
application from the market, fire it up, and you’ll be prompted to allow
the application superuser permissions - make sure you approve it.
The first thing you’ll need to do is flash the ClockworkMod recovery
image that I mentioned earlier, which can be done right in the app (it’s
the first option). ROM Manager should automatically find the latest
version of the right image for your phone, download, and install it -
the whole process is seamless.
After that is done, you can simply use the ‘Manage and Restore
Backups’, and ‘Backup current ROM’ options to, well, backup your current
ROM or restore from an existing backup. It’s that simple!
Save Space On Your Phone
While Google did introduce Apps2SD (moving parts of applications to
external storage) officially in the Froyo update, it remains up to
developers to manually add support for it in their apps. Because of
that, it's still fairly easy to overflow your internal storage and run
out of space.
The easiest way to alleviate this problem and enable most
applications to be movable to SD would be to flash a custom ROM that
enables just that. For example, CyanogenMod,
the most popular Android custom ROM, allows the user to force most apps
to SD even if developers of those apps didn't enable this feature. See 13 Ways CyanogenMod 7 Makes My Android Phone Feel Future-Proof [Deep Review] for more info on this and other amazing features of CyanogenMod.
Note that this doesn't work on all apps, notably keyboards and apps with widgets.
Install Custom ROMs
The Android custom ROM scene started growing shortly after the first
Android phone, the T-Mobile G1, was released. The ROMs that were
initially available just offered a few tweaks here and there - access to
developer only sections of the operating system, debugging information,
and things of that nature.
Now, a few years after the release of the G1, the Android ROM
community has grown immensely, and ROMs have been developed for most of
the Android phones currently on the market.
They've gone far beyond simple tweaks and can now give your phone an
entirely new look and feel. There are ROMs that can make your phone fly
by replacing the kernel with hyper-optimized versions or even
overclocking the CPU. The possibilities are nearly limitless and
attempting to cover all of the features of all the ROM's available for
all of the phones out there would be pretty much impossible.
If you're interested in flashing a custom ROM on your phone, your
best bet is to hit the Googles, search for "phonename custom ROM," and
see what comes up. You'll likely find at least one forum dedicated to
hacking your phone with plenty of information to get you started.
Here at AndroidPolice, we're planning a series of custom ROM reviews
for as many phones as we can get our hands on. Stay tuned for updates!
How Root The Tablet (Ex: Viewsonic Gtablet)
Root
Now that we got that out of the way, we need to gain root access. You need to sideload Z4 Root to your G Tablet. This allows us to modify all of the necessary files and use apps which require super user access.
Download Z4 Root here and then simply:
Connect your tab to your computer via USB, make sure USB debugging is ON
Turn on USB mass storage when your tablet prompts you
Move the Z4 Root .apk over to your tablet and safely remove before disconnecting
Open your favorite file manager, such as ES File Explorer, go to the root of your SD card, find Z4 Root and install it
After it installs, click open, run the app, sit back for a minute, and enjoy root access!
Ok, I’ve Rooted, So Now What?
Aside from allowing the installation of popular ROMs developed by the Android community, rooting your phone also comes with the benefit of being able to install apps that require root permissions.
Re flash your Android ROM after Rooting
Now that we have root, download the ROM of your choice:
From here it is another simple process:
Reconnect the G Tablet with USB debugging ON and mass storage ON
Unzip the ROM file on your desktop and move the two extracted files
(Recovery and Update File) over to the tablet in the ROOT of your
internal sd card
Disconnect the tablet and power it down
Press and HOLD and volume up button and then the power button
together until you see the screen go black and “android” printed on the
screen in gold letters, then release.
After you release you should see update package installing itself,
just be patient until the tablet reboots itself, and you are greeted by a
new boot animation to show you that the ROM was flashed successfully!
If you opt to test out several different ROMs, side load ROM Manager by ClockworkMod - it will allow you to easily boot into recovery and flash different ROMs.
Also be sure to keep checking those XDA threads for new updates and fixes!
And now enjoy your completely reborn Viewsonic G Tablet.
get information from: http://www.androidpolice.com/
A message from Brint to rom updators
This is the current BETA release of the CyanogenMod 6.1 port for
the G Tablet. There are still several issues, but it is far enough along
that I use it as my daily system. Please review issues and post new
ones as needed at the Issues page linked below. Feel free to leave
feedback in the forum, but I may not be able to follow up on it. The
best option is to catch me in #tegratab on Freenode IRC.
CyanogenMod 6.1 Beta4
CyanogenMod 6.1 Beta4 - MD5
ClockworkMod Recovery
My site: bekit.net post
gapps does work, but I probably should not release that here. Just make
sure it is the MDPI variety and has an update-binary compatible with
tegra.
*Note:
This version now matches the standards for SD card mounting on devices
with both internal and external SD card space. This means that the
external SD card slot now mounts to /mnt/sdcard (symlink /sdcard) and
the internal space mounts to /mnt/emmc (symlink /emmc). The device
properly recognizes the internal vs. external space and allows proper
unmounting and handling of the external SD card. This also means that
some apps (if they were coded poorly) will not recognize the internal SD
space as available SD card space and will require you ti insert an
external SD card. I will see if I can do something about the default
apps (read: camera) that have this problem; other apps will need to be
fixed by the developers.
Changelog:
CM6.1 Beta4:
Updated SD mappings for internal/external SD space to match standards (see note above)
Using latest available source from the CyanogenMod repo
Updated kernel to latest G Tablet version (still waiting on source so we can build our own)
Updated to the lasted drivers available for the G Tablet
Included updated libGLESv2 from nvidia (Angry Birds!)
Proper setup of CPU values - this allows the folio Flash APK to install properly
Matched fingerprint and device settings to latest G Tablet values
ClockworkMod Recovery 2.5.1.3 (2010.12.11):
Added options for managing the internal SD card
Using latest available source from the CyanogenMod repo
ClockworkMod Recovery 2.5.1.2 (2010.11.24):
Updated SD mappings to match standards (see note above)
Using latest available source from the CyanogenMod repo
Enjoy!
-Brint (bekit)
Root Only APPS
Finding such apps can be a hassle, so we’ve done some of the leg work
for you and come up with a detailed rundown of our top 8 root-only
applications.
 Titanium Backup
Cost: FREE (Full Version: $3.99)

The thought of losing all the apps on your Android device likely evokes a slight sinking sensation in your gut.
Fortunately for root users, Titanium Backup provides a 2-click peace
of mind solution, should such a tragedy befall you. Titanium Backup is a
powerful (you guessed it) backup utility which stores your apps, app
data, and system data on your SD card for safekeeping.
The application can be configured to run its tasks on a schedule, and
the $3.99 donate version allows you to set up multiple schedules for
the various combinations of backups it is capable of performing.
In addition to the aforementioned capabilities, Titanium
Backup can painlessly remove any application from your phone, including
system-installed apps (such as the pesky Amazon MP3 Store, Sprint NASCAR, NFL, and other garbage).
Be forewarned: Titanium Backup’s app removal
capabilities can break the OS if you happen to remove an item in your
app list that is necessary for critical system functions, in which case
you'd need to reboot into recovery and restore from a backup or flash a
new ROM.
 ROM Manager
Cost: FREE (Full Version: $3.99)

If you’ve ever thought about loading a custom ROM or kernel onto your
phone, ROM Manager will make the experience a lot more user friendly.
While it does require a little experience to use, it’s a lot easier than
using recovery boot to do it yourself.
ROM Manager allows you to flash almost any ZIP to your phone, whether
it be a kernel, ROM, app package, or radio image. ROM Manager does this
through Koushik Dutta's ClockworkMod Recovery (Koush, coincidentally,
is also the author of ROM Manager). Once a ROM or other flashable ZIP
file is selected, ROM manager will automatically reboot your phone and
flash it through ClockworkMod Recovery.
One of ROM Manager’s best features is its ability to
initiate nandroid backups. Using Clockwork Recovery (which must be
installed to use the app, and can be done, as shown above, from inside
ROM Manager), you can create full system images for easy restoration.
If you mess up your OS, load into Clockwork Recovery,
choose restore, find your backup, and voila! Your phone is back to the
exact state it was in before you ruined it.
ROM Manager has other features, including support for
installing and updating certain big name ROMs (such as Cyanogen), the
ability to download and install ZIP files via QR codes, a permissions
repair utility, SD card partitioning, and the option to flash
alternative recovery images.
ROM Manager is probably the most feature-packed
application on this list, and is definitely worth four dollars for the
premium version.
 ShootMe
Cost: FREE

No, this is not an app which unlocks your phone’s ability to mortally
wound you, nor is it yet another annoying soundboard. ShootMe is a
screenshot app that allows you to take a screenshot of your Android
device with a simple shake, without the need for a computer.
While of varying usefulness to different people, ShootMe is far and
away the most convenient screenshot app available for Android that I've
used. The catch, of course, is the requirement of root permissions to
run it.
Frankly, I find it useful when I want to shamelessly
brag to my iPhone-using friends about how awesome my Nexus One and
Android are.
 Juice Defender: Ultimate Juice
Cost: €2.79

Juice Defender is a battery conservation app. It uses various
triggers, rules, and timers to control how often your device utilizes
3G/EDGE APN's (data connections) as well as WiFi. These data connections
are the number one drainers of battery life when your phone is idle, so
Juice Defender allows you to decide when, where, and how often you want
them to be active.
Ultimate Juice (the paid version of Juice Defender) must be installed
over an existing copy of Juice Defender, and unlocks a few additional
capabilities for users with root permissions.
Ultimate Juice provides some extra goodies for root users,
particularly the ability to disable all 3G/EDGE (APN) connections on
your device during selected scenarios. This includes pesky background
mobile data services like Twitter or Facebook, potentially saving a lot
of battery life while your phone is idle. The ability to adjust CPU
clock speeds on the fly to conserve battery is another feature of Juice
which requires root permissions, and is as customizable as any of the
app’s many functions.
For a list of Ultimate Juice features that require root, its developers have provided this handy table in their FAQ.
 Root Explorer
Cost: £1.90

Root Explorer is an application for exploring your phone’s directories, much like Astro File Manager,
but with one advantage: it can delve into the deepest, darkest corners
of Android through the use of root permissions. This includes the
elusive “/data” directory, where treasures such as the dalvik cache and
application settings reside.
For developers and tinkerers, its usefulness is self-explanatory. For
the average user, it certainly is a solid file explorer with a likeable
interface, though I’d hesitate to call it as feature-rich as Astro.
One more unique feature of Root Explorer is the ability
to modify permissions settings on files or folders. The usefulness of
permissions modification is probably limited to developers for the
purposes of debugging and testing; then again, Root Explorer probably
wasn’t written with the average user in mind.

Edit by Artem: the "dontpanic" folder in the /data directory is simply hilarious.
 Quick Boot
Cost: FREE

Quick Boot is arguably the simplest application on this list.
However, I find it to be one of the most useful. Quick Boot does 3
things, and 3 things only: it allows you to reboot, recovery boot, or
bootloader boot with a single tap. The real usefulness of QuickBoot is
in the ability to make home screen widgets for these functions, so
they’re always at your fingertips (pun intended).
As has been pointed out to me, these features can all be had separately in other apps. CyanogenMod has the reboot function built into the power/end-button menu, and ROM Manager
sports a recovery boot button as part of its menu options. But, neither
of these have home screen shortcuts to the aforementioned functions.

Quick Boot may seem a trivial app, but I regularly use the reboot
button, and find it to be the easiest way to access reboot, bootloader,
and recovery boot functions.
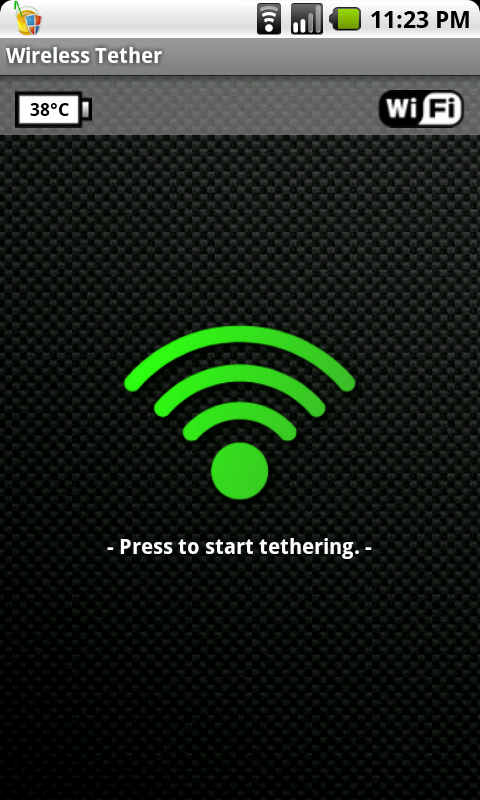
 Wireless Tether
Cost: FREE

This is the de-facto app when it comes to wireless tethering - it is free, open source, and actively maintained by its developer Harald Mue.
You can download the app from the market (the first QR code) or from the official google code page
(the second QR code). The latter contains experimental releases, which I
have so far found stable and more feature-rich than the latest stable
versions (specifically, 2.0.5pre2 brings support for WPA2 and infrastructure mode to the EVO 4G).
Wireless Tether remains the best way to utilize your Android device
as a WiFi or Bluetooth (PAN) hotspot, and can be installed on nearly any
Android device, including those running older versions of the Android
OS.
Wireless Tether boasts customization that FroYo’s tether can’t quite
match for sheer geekery. The ability to change your wireless LAN’s
network block (ie, 192.168.2 vs 10.10.1), enable access control (choose
which clients may use your network by MAC address), and alter your
broadcasting channel are all features which FroYo’s tethering app
currently lacks.

Wireless Tether isn’t perfect; it doesn’t support USB
tethering, and certain features (like some higher frequency broadcast
channels or alternative encryption schemes) are limited by the hardware
of older Android devices.
 Shark For Root
Cost: FREE

This app was previously known as Andro Shark over at the XDA forums,
and was in closed beta for some time until it recently reappeared as
Shark For Root on the Android Market.
What does it do? It’s essentially a stripped down version of WireShark
for your Android phone. It’s a particularly geeky app to have, but for
developers or those of us obsessed with monitoring where our traffic is
going, it’s a godsend.
Shark monitors all network activity on your device
(presumably from all interfaces) and outputs a .pcap file. Unfortunately
there is no live feed of the log being generated, and currently no app
which can read a .pcap file is available on Android. But, this is still a
beta and those features may eventually materialize.
What About You?
reply us


")
No comments:
Post a Comment